April/May Adventures
So here are some things I did in the month of April/ May, a bit late to be posting this now but better late then never lol. Might update this as time passes.
Uploading through RPi through the Arduino
In most cases, we connect the Arduino to the Raspberry Pi through a USB Cable to upload code to the Arduino. However, I wanted to try uploading through the Raspberry Pi's GPIO Serial port for my CG2111A robot, and here are the findings
Connect the circuit as such
| Arduino Pin | Raspberry Pi Pin |
|---|---|
| Tx | Rx |
| Rx | Tx |
| RESET | Any GPIO Pin |
Concept is to keep the arduino held at reset till the Raspberry Pi just started uploading to the Arduino. This can be done through a Simple Shell Script.
There are a few considerations for the shell script
- The Arduino IDE has a CLI which we can use to build our binary
- We can use raspi-gpio to control our gpio pins easily
- We can get the commands needed to upload the bin file to the Arduino by setting it to be Verbose.
#!/bin/sh

PATH_TO_PROJ=Alex/ # Arduino Project folder
FILENAME=Alex.ino # .ino file name

rm -rf /tmp/arduino_build
arduino --pref build.path=/tmp/arduino_build --verify $PATH_TO_PROJ$FILENAME
#Alex/Alex.ino

# Force Reset
raspi-gpio set 23 op
raspi-gpio set 23 dh
raspi-gpio set 23 dl

/home/pi/arduino-1.8.19/hardware/tools/avr/bin/avrdude -C/home/pi/arduino-1.8.19/hardware/tools/avr/etc/avrdude.conf -v -patmega2560 -cwiring -P/dev/ttyS0 -b115200 -D -Uflash:w:/tmp/arduino_build/$FILENAME.hex:i
ATTiny UPDI Programming
So Bumblebee had this Soldering Challenge and I wanted to make use of the board, so here are my findings
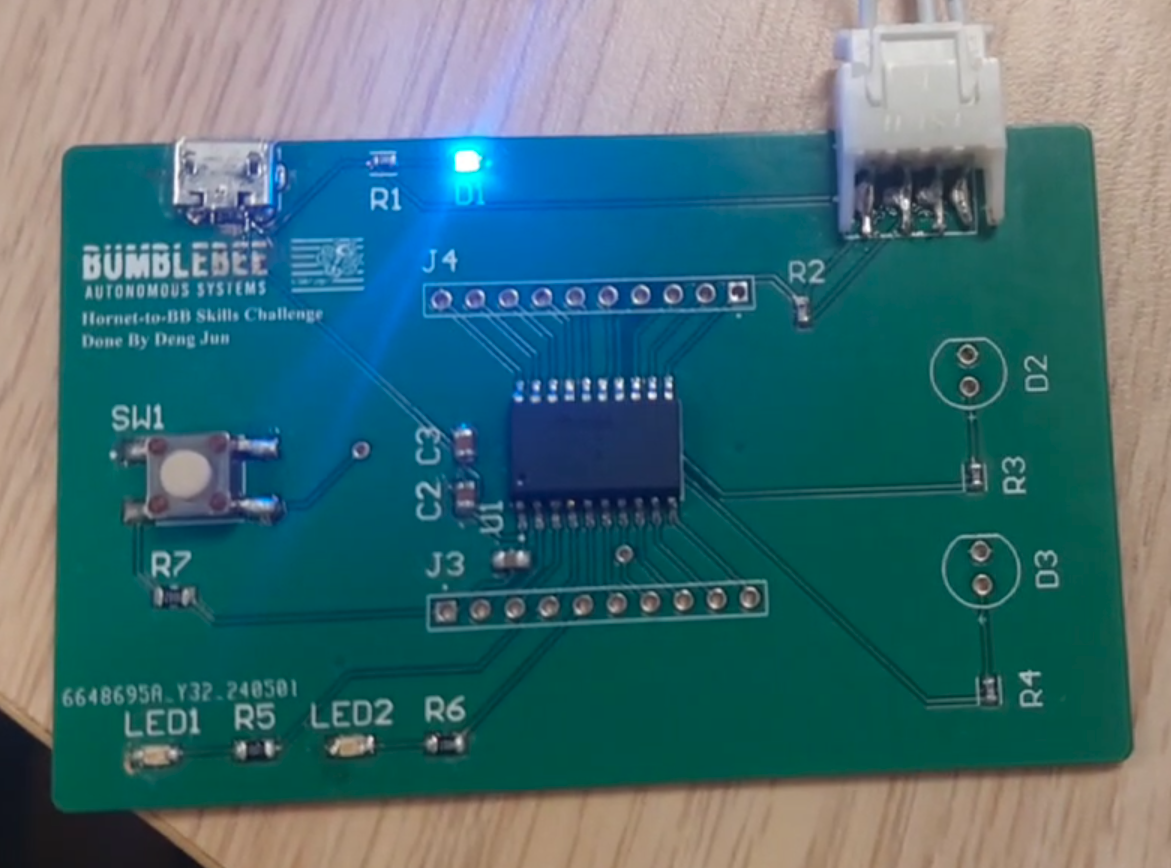
TLDR
- Take about 2h ish to solder? (skill issue)
- https://www.youtube.com/watch?v=AL9vK_xMt4E&ab_channel=bitluni is a useful guide
- Connect to pin 3 of the programming header (the one with the resistor) to pin 6 of the Arduino Uno, and 5V and GND
- Use arduino 1.8.13 for board manager to detect. Remember to set board settings properly (set the correct chip)
- Use jtag2updi on an Arduino Uno to upload. You must put a capacitor between reset & GND on the uno
- LEDs & button appear to be working
Nix OS Tutorial
I have set up a home server (again), but hopefully this one is more robust than the previous Raspberry Pi.
Steps to setting up NixOS
- Download ISO online
- Partition Hard-Disk and Install to that partition
- Setup GRUB Bootloader
- Configuration of NixOS
Bootloader Issues
I faced some bootloader issues with my setup that required me to manually force install grub. Related resources are as such:
- https://nixos.wiki/wiki/Bootloader
- https://askubuntu.com/questions/1161746/grub-install-error-will-not-proceed-with-blocklists
In the config, I then disabled the bootloader so that regenerating config doesn't cause issues
  # Bootloader.
  boot.loader.grub.enable = true;
  boot.loader.grub.device = "nodev";
  #boot.loader.grub.device = "/dev/sda"; # manually install with grub-install -f /dev/sda
  boot.loader.grub.useOSProber = true;